Showing posts with label Having Fun in Kitchen. Show all posts

Saturday, November 9, 2013

Kimchi bokkeumbap


Kimchi is always a "must have" dish in my kitchen. Since I'm going to make a new 
batch of kimchi, I decided to clear the stock by making kimchi bokkeumbap (kimchi fried rice)
This is a very simple dish, you can either use the store 
bought kimchi or use  homemade kimchi like me.
Please visit maangachi's page for recipe.


 Enjoy~

Monday, November 4, 2013

Red wine cranberry walnut bread


This is one of my favorite recipe so far. Look at the crust..yum~ 
I just can't resist to make it over and over again. 


Here's the recipe from Caroleasylife
Since it's  in chinese, I'll try my best to translate it into english.

Main ingredients:
Old dough 50g (see below for recipe), Bread flour 200g, Wholewheat flour 50g, water 90g (I used 100g), 
cranberry 40g, red wine 100g , chopped walnut 40g, salt 3/4 teaspoon, instant yeast 1/2 teaspoon.

Preparation:
1. Soak cranberry in 50 g red wine(from the 100g red wine) and keep in fridge for 2 days. 
Drain and gently pat dry with kitchen paper towel before use.  
2. Toast the walnut in oven for 7-8 minutes, 150c.
3. Boil the red wine before use, if not it will affect the dough fermentation process. 

Old dough:
Bread flour 125g, water 75g, instant yeast 1/4 teaspoon, salt 1/4 teaspoon.
1.Mix all the ingredients and cover to rise in room temperature 
for 4 hours or leave it in fridge to rise overnight.
2 Cut the fermented dough into 50g each. Freeze it if you can't finish it in 3 days.

Let's start:
1. Mix all the main ingredients except walnut and cranberry.
2. Knead the dough until smooth and past the windowpane test. 
3. If the dough is too dry, just add a bit more water. 
The dough should feel smooth and supple.
4. Knead in walnut and cranberry. Be gentle, not to break the cranberry.
5. Cover with kitchen towel for 60 minutes.
6. After the dough double its size, gently punch down the dough, lightly floured the dough and transfer to a proofing basket .If you don't have one is ok, just leave it on a baking pan for second rise, about 60 minutes.
7. When the dough is ready, remove from the basket and put it in a baking pan. 
Use a shape knife to cut a cross and brush some olive oil on it. 
8. Spray enough water on the dough  surface and bake for 20 -25 minutes, 210c.
9. In order to make a great, crispy and caramelized crust, place a glass of water 
on the baking pan to create steam into the oven.


Monday, July 8, 2013

Mr. Wabbit Deco Roll


Aww...it's so cute~~
This is what I felt when I first saw this cute little deco roll online. 
Why it is known as deco roll instead of swiss roll? 
Simple, because it has decoration on it. Haha..I guess so....
It is originated from Japan by a creative baker ~ Junko.
You can go to her blog to know more about deco roll but it's in Japanese. 


 Here's my Chocolate Mint Deco Roll


I don't have the silicon mat pattern like Junko. So I just draw by own wabbit..haha. Not too bad huh...^^
 Going to try out other pattern next time. XD

Recipe adapted from neyeeloh
10x10 inch square pan

A: (cake base)
egg yolk 4
sugar 15g
water/milk 60ml
canola oil 40 ml
vanilla essence 1 tsp
cake flour 70g
cocoa powder 10g
egg white 3
sugar 50g

B:(pattern)
egg white 1
sugar 2 tsp
egg yolk batter 2 tbsp
cake flour 1 tsp
brown colouring (I used cocoa powder)

C:(Filling)
non-dairy whipping cream 150g
powdered sugar 1 tbsp
peppermint extract a few drops

D:( for drawing)
water 1/2 tsp
cocoa powder 1/4 tsp

Preparation
1.Whisk the whipping cream until firm peak and keep in refrigerator. TIPS: Chill the whipping cream by placing a bowl filled with ice under the bowl you used to whisk the cream. It helps to make a firm and stable cream filling.
2. Place a parchment paper on top of your pattern and lightly grease with butter/oil. This is to prevent the pattern from sticking on your parchment paper.

Egg yolk batter
Whisk the egg yolk and  15g sugar until pale yellow, add in oil, water/milk, vanilla essence and cake flour.

For the pattern 
1.Scoop 2 tbsp egg yolk batter , add 1tsp cake flour .
2. Whisk the egg white and sugar until firm peak.
3. Add 2 tsp meringue to the yolk batter and mix well. 
4. Scoop out 1tbsp and add a bit of cocoa powder. 
5. Use a piping bag to pipe out the rabbit nose area with cocoa meringue. Bake for 1 minutes at 180C.
6. Continue with the plain meringue for the rest of the pattern. Bake for 1 minutes. TIPS: ONLY 1 minutes. 
Back to the cake base
1. Add 10 g cocoa powder to the egg yolk batter.Mix well.
2.Whisk the egg white and sugar until firm peak Mix with the cocoa batter until combined. Fold in the leftover meringue from pattern ,if any.TIPS: Fold gently.
3. Pour the batter evenly in the pan with pattern on it. Drop the pan a few time on the table to get rid of trapped bubble.
4. Bake for 10 -12 minutes at 180C. 
5. Roll the cake while it is still warm together with parchment paper to prevent crack on the surface.
6. When the cake cool down, unroll the cake and spread with whipping cream.
7. Keep in refrigerator for at least 1 hour. Use a fine brush to draw the eyes and nose. Done~


Sunday, June 23, 2013

Korean side dish: Kongjaban


This is one of my favorite korean side dish and it's very easy to make too.

What you need is:

1 1/2 cups black beans
3 cups water
1/2 cup soy sauce 
4 tbsp honey (original recipe use corn syrup)
2 tbsp sugar (original recipe use 4 tbsp)
1/2 tbsp  sesame seeds

Let's start~
1. Soak the beans for 8 hours or overnight.
2. Put the beans in a deep pan with 3 cups of water.
3. Turn on high heat and boil for 20-25 minutes or until water reduce to half.
4. Add soy sauce, honey and sugar.
5. Reduce the heat to medium high and continue to cook until the water dries up. Be careful don't burn your your bean!
6. Add sesame seeds and cook on low heat for another 5 minutes. 
7. Done! Keep in refrigerator once it cool down.

Recipe adapted from: Aeri's Kitchen

Sunday, June 16, 2013

Wholemeal Cinnamon Cranberry Bagel


Here's my all time favorite~Bagel. 
It's not a common bread that you can get in Malaysia bakery. 
That's why I decided to bake my own bagel.
This is my 3rd attempt and I'm still not satisfy with the bagel shape. 
I'll keep trying until I get a smooth and round bagel!!


Here's the recipe (adapted from Barbara bakes)
Note: If you like wholemeal bread, just substitute half of the bread flour with wholemeal flour.
You will notice the recipe requested to retard the bagel dough in refrigerator but I skipped the step (too lazy to do so). I just straight away bake and eat it..YUM!!!

Saturday, April 20, 2013

Hokkaido milk loaf


Recently, I came across this bread recipe using Tang zhong method.(water roux starter)
As per the recipe, this is the most reliable method to get a soft and fluffy bread . 
As a beginner of bread making, I'm  really attracted to the word "soft and fluffy". 
Must give it a try!

My milk loaf before bake.

It suppose to yield 2 milk  loafs but I don't have a proper bread
 loaf tin so I just squeezed in a cake loaf tin.. So as you can see it's a bit overcrowded. XD.


 Seriously, I was impressed by the result!!
Tang zhong method really guaranteed for a soft and fluffy bread which can last for at least 3 days.
For all beginners, please do try out this recipe and 
I'am sure you will get addicted to tang zhong method like I do.

Here's the recipe from Christine recipes
Happy trying~

Sunday, April 22, 2012

Chocolate sour cream marble cake

Just to share with you a simple and delicious recipe of marble cake.

 Ingredients:
1 .butter 210g
2. sugar 270g (I reduced to 230g)
3. 4 eggs
4. vanilla extract 2tsp
5. light sour cream 175g
6. flour 350g
7. baking powder 1/6 tsp
8. baking powder 2 1/3 tsp
9. cocoa powder 2 1/2 tbs
10. Hot water 2 1/2 tbs

How to
As simple as 1,2,3...yup...just mix the ingredients one by one from 1 to 8. Simple right? Make sure that each ingredient is mixed well before adding the next ingredient. Divided the batter into 2 bowls. One will be the vanilla  flavour while another bowl will be mixed with cocoa mixture ( from combining 9 and 10).  Take 2 spoons and use them to dollop the chocolate and vanilla cake mixes into the bundt cake tin alternately. When all the mixture has been used up, tap the bottom on your work surface to ensure that there aren't any air bubbles. Take a chopstick and swirl it around the mixture in the tin a few times to create a marbled effect. 
Bake for 30 minutes  @ 180 C.

Sunday, March 25, 2012

Blueberry Mini Cheesecake

这是我第一次尝试烤cheesecake. 虽然我不是很喜欢吃cheesecake,
不过小Q爱吃那就试一试吧。味道也很不错哟。

食谱是摘自joyofbaking, 不过我已经改良成比较适合我们的口味。
因为是摘自网上所以就直接用英文好了。

Crust Ingredients
150g digestive biscuit
1 tablespoon sugar
4-5 tablespoon butter
Cheese filling
500g cream cheese
90g sugar(original recipe 130g)
1/8 tsp salt
2 large eggs
1tsp vanilla extract
1/2 tsp lemon zest
1/2 cup sour cream
1/3 cup blueberry jam (warmed)

Lets start!
  1. Preheat the oven to 150°. Line a standard 14-cup muffin pan with baking cups. Crush the digestive biscuit and mix with butter and sugar. Process until fine crumbs form. Spoon the crumbs into the prepared baking cups and press with the bottom of a glass to compact. Keep in fridge for 10 minutes, or until almost set.
  2. Meanwhile, in a medium bowl, beat the cream cheese and sugar at medium speed until smooth. Beat in the rest of the ingredients one by one from salt to sour cream.
  3. Pour the cheesecake batter into the baking cups, filling them three-quarters full. 
  4. Place 1/2 teaspoon of jam in the middle and use a toothpick to make pattern if desired. 
  5. Bake the cheesecakes for 15 minutes, or until slightly jiggly in the center. Remove from the oven and let it cool down for 20 minutes. Transfer the muffin tin to the fridge and chill the cheesecakes until set. (I kept it for overnight)
  6. Remove the cheesecakes from the pan and peel off the foil baking cups. Transfer the cheesecakes to a platter and serve.


Tuesday, February 21, 2012

ddukbokki


ddukbokki is one of my favourite Korean dishes. 
It is also one of the popular street food in Korea because
you can find it almost everywhere in Korea.
It's quite easy to prepare, what you need is
tubed shape rice cake about 300g, hot pepper paste 4-6 tbs, sugar 1tbs, 4 cups of water,
some dried anchovies, hot pepper flakes and green onions
I also added some sliced potato, carrot, sausage and cabbage to make it taste better.

Start cooking!!!
  1. Separate the tubes of rice cake into individual pieces.
  2. In a pan, pour 4 cups of water and add dried anchovies. 
  3. Boil the water for 10 minutes over medium heat.
  4. Remove the anchovies and add the rice cakes, hot pepper paste, sugar, and  hot pepper flakes. Stir it constantly.
  5. Lastly, add in the green onions.
  6. Keep stirring until the sauce is thick and the rice cake is shiny.
  7. Enjoy!!!


Saturday, August 14, 2010

加哩鸡肉饼


今天准备了些材料,想尝试煮加哩鸡肉饼。
尝试”=没煮过=成功或失败。。哈哈
当然为了不要太丢脸还是有上网做点功课啰。
鸡肉饼的材料有:鸡腿肉(切成肉碎),玉米粒,萝卜粒,葱,玉米粉,鸡蛋。
调味料:盐,黑胡椒粒


把全部材料混合,再捏成肉饼型就可以下锅煎啦。

加哩酱是用日本加哩块煮成的。
比较简单嘛。
这样的组合还蛮不错的哟。
总结这次的下厨试验还算成功。
至少学会一道新菜色啦。。

Friday, May 29, 2009

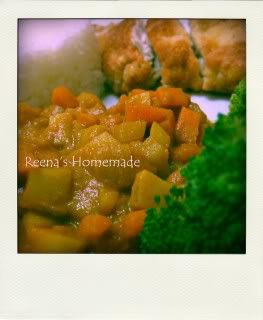
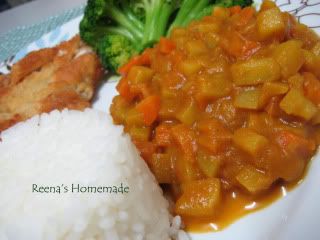
Japanese Curry Rice

Photobucket


好久没有下厨了,这次就决定煮日本加哩鸡排饭。yum~yum~


Photobucket


新手嘛。。下厨的时候都有点七手八脚,不过下厨真的很有趣哦。


日本加哩的味道很浓郁。和其他加哩有点不同因为日本加哩带点甜甜的。适合不吃辣又想吃加哩的人哦。


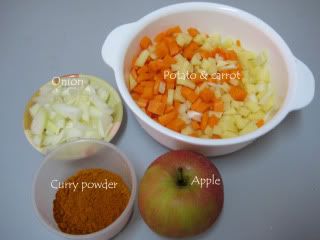
材料很简单:

马铃薯,红萝卜,葱,加哩粉,苹果

(市面上有卖现成的日本加哩块,很方便哦。如果没有就像我一样自己调咯。。)


Photobucket

做法:

1。马铃薯,红萝卜,葱都切丁。苹果去皮搅成泥状

2。先把马铃薯,红萝卜,葱翻炒,在加入加哩粉和苹果泥。

3。加入适量的水再焖煮大约20分钟或至到马铃薯和红萝卜都变软就可以了。

4。记得调味哦。。我用了鸡精块。效果不错。。。

5。去骨鸡腿沾点面粉,蛋液和面包粉炸至金黄色

6。然后搭配蔬菜就完成啦!!

Photobucket


味道真得很不错哟。。哈哈(有点卖花赞花香)

如果你觉得煮得不错就记得推一推哦。


PS:每次下厨,小Q都帮我很大的忙,谢谢哦。。,还有他要我特地强调鸡排是他炸的啦。。嘻嘻。。

Saturday, December 13, 2008

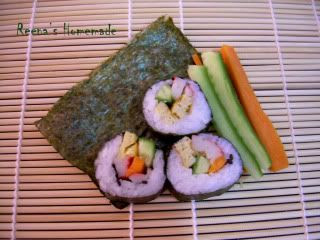
~Sushi~

Photobucket

寿司是其中一种日本料理,相信大家都对它很熟悉了。

记得以前我都不怎么爱吃寿司,味道怪怪的,而且又冷冷的。

我有个朋友,她超爱寿司。有一次她自制寿司叫我偿偿。

试了几口,感觉味道还不错。虽然没有变成寿司粉丝,不过总算接受了它

这次做寿司是因为男友说想吃所以就买了材料来试试看

Photobucket

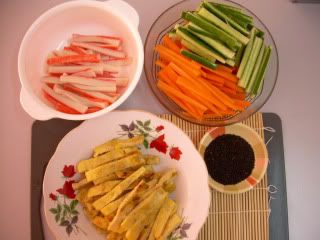
馅料依个人喜好,我选了小黄瓜,红萝卜,甜蛋,蟹肉条和一点点黑芝麻。

Photobucket

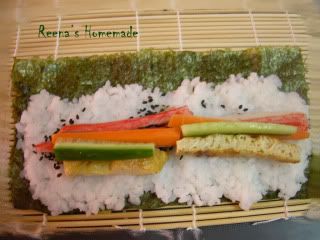
日本米煮熟后,趁热加日本醋搅拌。记得试味哦。把饭均匀的铺在紫菜上,在放馅料。

卷寿司时要小心点哦。。有竹帘的帮忙当然比较容易

切块后就可以吃啦!!

制作感言:

第一次做,男友的评分是:外观不错,味道就淡了些。可能醋太少了。下次再加油啰。

Sunday, September 21, 2008

柳橙奶油蛋糕

Photobucket

中学时就非常喜欢西点,还记得当时收集了很多从报章和杂志剪下的食谱可是都没机会试做因为家里没有烤箱嘛。直到中五我才有属于我自己的烤箱,是爸爸送我的生日礼物哦。

家人和身边的朋友一直以来都是我最佳的白老鼠另我太感动了。 (哥哥:救命啊!)哈哈。。

尝试过很多不同的食谱,最喜欢海棉蛋糕和苹果派了。。

经过多年的磨练总算有点成绩了。虽然没有大师的水准不过还不错啦。

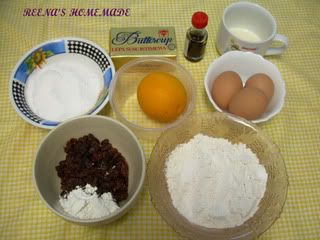
前几天烤了个奶油蛋糕,材料有:

Photobucket

1。奶油 180g

2。幼糖 160g

3。蛋 3粒

4。柳橙皮 1粒

5。vanilla essence 1匙

6。柳橙汁 2匙

7。面粉 180g

8。泡打粉 1/2匙

9。葡萄干 100g(加一匙面粉搅拌)

做法非常简单,只要顺序从1-9一个个加进搅拌机就好了。然后放进烤箱以180度烤50分钟就可以享用热腾腾的蛋糕咯

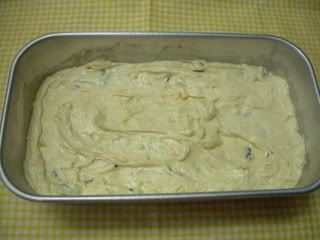
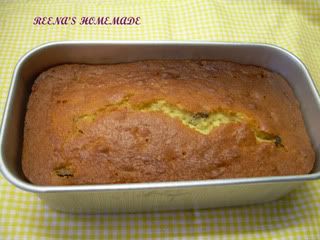
Before~~~

Photobucket

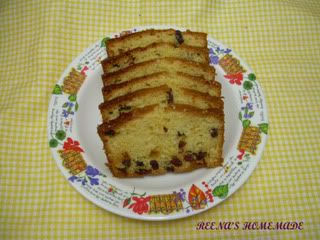
After~~~~

Photobucket